A barrier gate that performs flawlessly on a spec sheet can become a daily source of complaints if the site wasn’t properly assessed before installation. Incorrect lane widths cause sideswipe damage. Inadequate power supply leads to intermittent failures. Poor drainage floods the gate island in the first heavy rain. And overlooking ADA requirements can result in fines and forced retrofits that cost more than the original installation.
The site assessment is where a successful barrier gate project is won or lost. This guide provides a comprehensive checklist for evaluating a parking facility before a single piece of equipment is ordered.
Why Site Assessment Matters
Barrier gate manufacturers – CAME, FAAC, Magnetic Autocontrol, Nice/Hi-Speed, Parking BOXX, and others – design their products for a range of installation scenarios, but they all assume that the installer has verified certain site conditions. When those assumptions don’t match reality, the result is a system that underperforms, breaks prematurely, or creates safety hazards.
A thorough site assessment also:
- Prevents costly change orders during installation
- Identifies obstacles that might require civil work (concrete pads, drainage, bollards)
- Ensures compliance with local codes and the Americans with Disabilities Act (ADA)
- Documents the baseline condition of the site for warranty and liability purposes
Pre-Visit Preparation
Before arriving at the site, gather the following:
- Site plan or aerial image: Google Earth, a CAD drawing, or even a hand-drawn layout with approximate dimensions. Mark existing entry/exit points, sidewalks, buildings, and utilities.
- Traffic data: Average daily vehicle count, peak arrival rate (vehicles per hour), and the split between regular users and transient visitors.
- Existing infrastructure records: Electrical panel location and capacity, conduit routes, existing cameras or access control hardware, communication closets or server rooms.
- Project scope document: How many lanes, what credential types, and any integration requirements (payment systems, building access, LPR).
- Local code references: Zoning permits, building codes, fire department access requirements, and ADA guidelines applicable to the jurisdiction.
Site Assessment Checklist
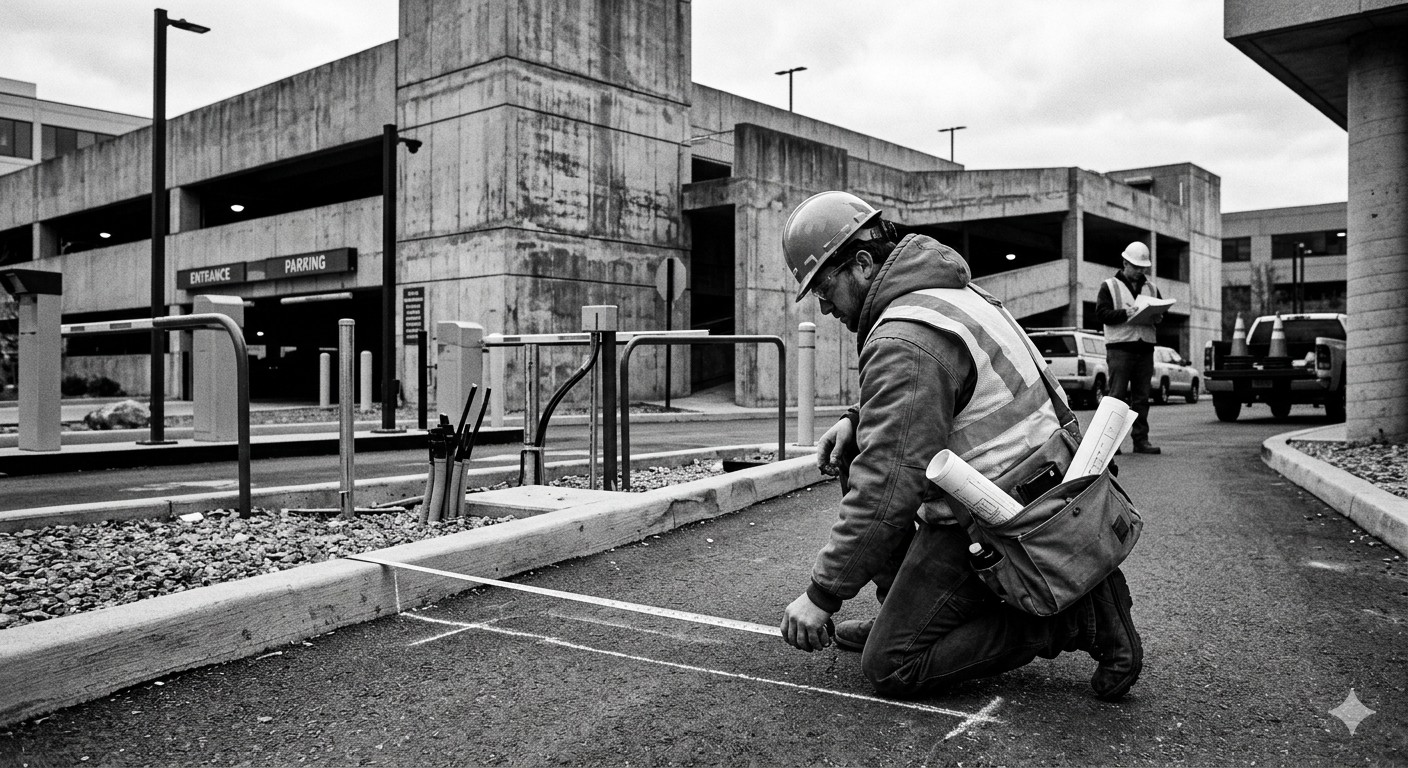
1. Traffic Flow and Lane Geometry
The physical layout of the entry and exit lanes determines whether vehicles can approach the gate safely, queue without blocking public roads, and maneuver through the facility without conflict.
Measure and document:
| Parameter | Minimum Recommended | Notes |
|---|---|---|
| Lane width | 2.7 m (9 ft) standard; 3.0 m (10 ft) preferred | Wider for facilities serving trucks or RVs |
| Approach distance (gate to property line) | 15 m (50 ft) minimum | Prevents queuing onto public roads |
| Queue storage | 5-8 vehicles per entry lane | Based on peak arrival rate and gate cycle time |
| Turning radius to enter lane | 7.5 m (25 ft) minimum | Tighter turns slow approach and cause lane drift |
| Distance between entry and exit lanes | 3.0 m (10 ft) minimum separation | Prevents head-on conflicts at shared approaches |
| Gate arm clearance height | 0.9-1.2 m (3-4 ft) above grade | Must clear all expected vehicle types |
For guidance on how lane geometry affects the broader parking lot design, the parking lot layout principles resource covers vehicle circulation, stall dimensions, and traffic flow patterns that directly influence gate placement.
Key observations:
- Is there a grade change (slope) at the gate location? Steep grades complicate gate installation and affect vehicle stopping.
- Are there sight-line obstructions (walls, landscaping, columns) that could create blind spots for approaching vehicles?
- Do pedestrians cross the vehicle lane near the gate? If so, separate pedestrian paths with bollards or raised medians.
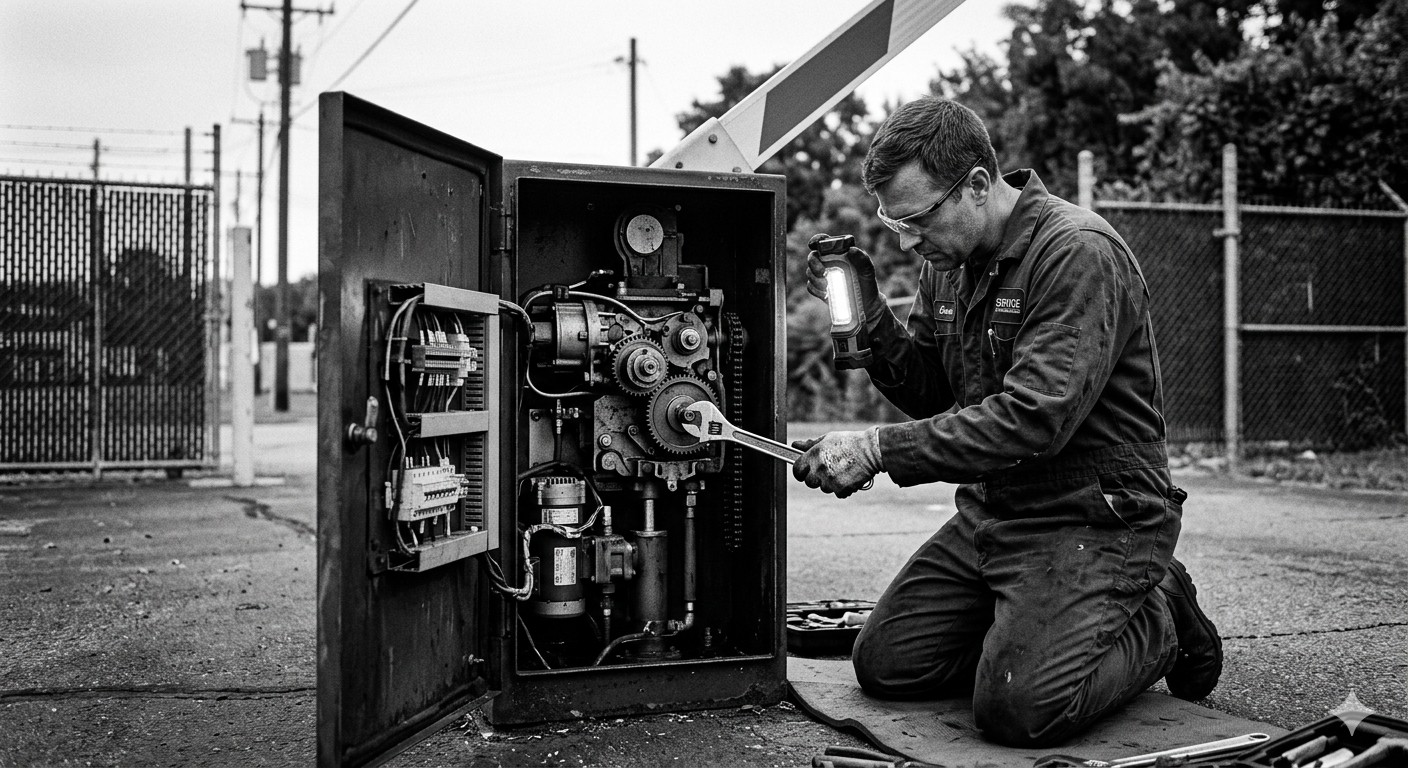
2. Power Supply and Electrical Infrastructure
Every barrier gate requires reliable power. The type and amount of power depends on the gate model, motor type, and integrated peripherals.
Verify:
- Nearest power source: Measure the distance from the gate location to the closest electrical panel. Runs beyond 30 meters may require larger gauge wiring or a dedicated sub-panel.
- Available capacity: A single-barrier gate with an access reader draws 3-8 amps at 120V. Add pay stations, LPR cameras, lighting, and signage, and a lane can draw 15-30 amps. Confirm the panel has sufficient capacity.
- Voltage and phase: Most commercial barrier gates operate on 120V or 240V single-phase. Industrial or high-speed gates may require three-phase power.
- Backup power: Will the gates need to operate during power outages? DC motor gates can run on battery backup. AC or hydraulic gates require a UPS or generator.
- Existing conduit: Is there underground conduit already routed to the gate location, or will trenching be required? Trenching through asphalt or concrete adds significant cost.
3. Communication and Data Infrastructure
Modern barrier gates are networked devices. They communicate with access control servers, payment systems, LPR cameras, and management software.
Verify:
- Network availability: Is there a wired Ethernet connection within reach of the gate location? If not, can conduit accommodate network cabling alongside power?
- Wireless options: If wired networking is impractical, assess cellular signal strength and Wi-Fi coverage. Industrial cellular gateways are common but add ongoing data costs.
- Integration points: Where is the access control server located? What communication protocol does it use (TCP/IP, RS-485, Wiegand)? Confirm compatibility with the selected barrier gate controller.
- Intercom/help stations: If the gate will have an intercom or video help station, identify the backhaul connection (VoIP, analog phone line, cellular).
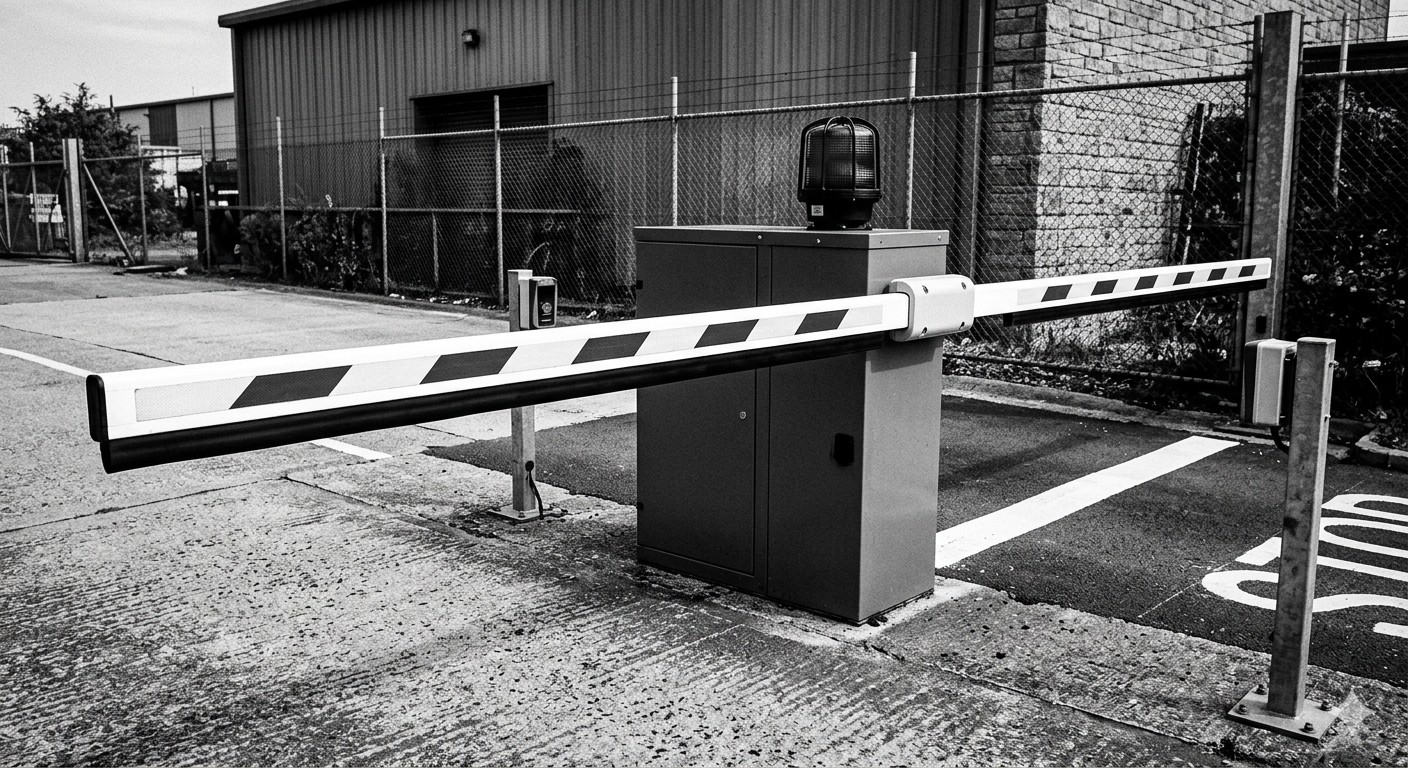
4. Foundations and Civil Work
Barrier gates mount on concrete foundations that must be flat, level, and strong enough to resist the torque of arm operation and the impact of vehicle contact.
Assess:
- Existing surface condition: Is the pavement at the gate location in good condition, or does it need repair before installation? Cracked or settling asphalt will undermine a gate foundation.
- Foundation requirements: Most manufacturers specify a minimum concrete pad of 60 cm x 60 cm x 30 cm deep (24" x 24" x 12"). Verify that the location can accommodate this without conflicting with underground utilities.
- Bollard protection: Gate housings should be protected by bollards to prevent vehicle impact damage. Plan bollard locations that protect the gate without restricting pedestrian access or maintenance access.
- Conduit routing: Power, network, and peripheral cabling must enter the gate housing through sealed conduit penetrations in the foundation. Plan conduit routes before pouring concrete.
- Island construction: If the gate will be on a raised island (recommended for protection and drainage), design the island dimensions to accommodate the gate, any readers or ticket dispensers, and maintenance access.
5. Drainage and Environmental Conditions
Water is the leading cause of premature barrier gate failure. Standing water at the base, moisture intrusion through conduit, and flooding during storms destroy electronics and corrode mechanical components.
Evaluate:
- Drainage grade: Does water flow away from the gate location, or does it pool? Inspect the area during or after rain if possible.
- Flood history: Has the area ever flooded? Check with facility management and local flood maps.
- Conduit sealing: All underground conduit must be sealed at both ends to prevent water migration. Use duct seal or conduit bodies with drain provisions.
- Snow and ice: In cold climates, consider snow plow paths relative to the gate. Plows routinely damage gates that are placed too close to the travel lane. Also consider ice buildup on the arm and housing.
- Sun exposure: Gate housings in direct sun can experience internal temperatures exceeding 60 degrees C (140 degrees F). Verify that the selected gate model is rated for the expected temperature range or plan for shade structures.
6. ADA and Accessibility Compliance
The Americans with Disabilities Act and local accessibility codes impose specific requirements on parking facility access points. These requirements are not optional and are frequently overlooked in barrier gate installations.
Confirm compliance with:
- Accessible route clearance: If a pedestrian path crosses or runs adjacent to the gate lane, it must maintain the required clear width (minimum 36 inches) and be free of protruding objects. Reference ADA standards for accessible design for current requirements.
- Accessible parking proximity: Accessible parking spaces must be located on the shortest accessible route to the facility entrance. If the barrier gate restricts this route, accommodations must be provided.
- Height-mounted devices: Ticket dispensers, card readers, and intercoms must be reachable from a vehicle with the controls at an appropriate height (typically 42-48 inches from the driving surface).
- Signage: Required accessible parking and directional signage must not be obstructed by the gate installation.
- Emergency access: Fire lanes and emergency vehicle access must not be impeded by the barrier gate. Coordinate with the local fire marshal to verify compliance.
The International Parking and Mobility Institute (IPMI) publishes guidelines on accessible parking design that complement ADA requirements with parking-specific best practices.
7. Safety and Security
Barrier gates are heavy mechanical devices that move with significant force. Safety must be designed into the installation, not bolted on afterward.
Evaluate:
- Safety device placement: Every barrier gate lane needs presence detection loops (inductive loops embedded in the pavement) at minimum. Photo eyes, safety edges on the arm, and overhead presence sensors provide additional protection layers.
- Loop detector locations: Vehicle detection loops are typically placed at the gate (to prevent the arm from closing on a vehicle) and downstream (to detect vehicle passage for gate close timing). Mark loop positions during the site assessment.
- Pedestrian separation: If pedestrians can access the gate lane, physical barriers (fencing, bollards, raised curbs) and warning signage are necessary.
- Lighting: The gate area must be well-lit for safety, camera image quality, and driver visibility. Assess existing lighting levels and plan supplemental lighting if needed.
- Emergency release: All barrier gates must have a manual release mechanism accessible to authorized personnel. Verify that the release location is accessible and clearly marked.
For detailed information on the specific safety codes that govern barrier gate installations, see our guide to barrier gate safety standards and compliance.
8. Peripheral Equipment Placement
A barrier gate rarely stands alone. The entry lane typically includes a credential reader, ticket dispenser, or intercom, and the exit lane includes a pay station or validator. Each peripheral has its own mounting, power, and communication requirements.
Plan placement for:
- Card/RFID readers: Position at driver’s window height, close enough to reach without leaning excessively. Account for vehicle offset (drivers don’t always pull perfectly parallel).
- Ticket dispensers: Must be positioned so the driver can reach the ticket without unbuckling. The dispenser’s paper tray requires periodic reloading – ensure maintenance access.
- Pay stations: Exit pay stations need sufficient space for the driver to stop, pay, and collect change or a receipt. The station must not block the gate arm sweep.
- LPR cameras: Camera position is critical for read accuracy. The optimal angle and distance depend on the specific camera model and lane geometry.
- Signage and displays: Lane status indicators, rate signs, and directional signage need power and mounting provisions. Plan these during the site assessment, not as an afterthought.
For a comprehensive view of access control options and how they integrate with barrier gates, see our access control systems overview.
Documentation and Deliverables
A complete site assessment should produce the following deliverables:
- Site survey drawing: A scaled drawing showing gate locations, lane geometry, utility routes, and peripheral equipment positions. Include measurements, not just approximations.
- Photo documentation: Photographs of the gate location from multiple angles, existing electrical panels, conduit routes, drainage conditions, and any obstructions or concerns.
- Utility verification: Confirmation of available power capacity, network connectivity, and communication infrastructure. Include panel schedules and circuit identification.
- Code compliance notes: A summary of applicable building codes, ADA requirements, and fire access provisions. Flag any conditions that require variance or special accommodation.
- Risk register: A list of potential issues identified during the assessment (poor drainage, insufficient power, code conflicts) with recommended mitigation actions and estimated costs.
- Budget impact assessment: Any civil work, electrical upgrades, or infrastructure additions that will affect the project budget beyond the equipment cost.
Common Site Assessment Mistakes
Having reviewed the checklist, these are the errors that most frequently cause problems during and after installation:
| Mistake | Consequence | Prevention |
|---|---|---|
| Not measuring queue storage | Vehicles back up onto public road | Calculate peak arrival rate x gate cycle time |
| Assuming power is adequate | Breaker trips under load | Measure actual available capacity at the panel |
| Ignoring drainage | Flooded gate housing, electronics failure | Inspect during rain; review drainage grade |
| Skipping ADA review | Code violation, forced retrofit | Review ADA standards before finalizing layout |
| Forgetting conduit for future needs | Expensive trenching for later additions | Run spare conduit during initial installation |
| Not checking underground utilities | Cut water/gas/fiber during trenching | Call 811 (or local equivalent) before any excavation |
Engaging Stakeholders
A site assessment is not a solo activity. Effective assessments include input from:
- Facility management: They know the site’s history, problem areas, and operational requirements.
- Electrical contractor: Verify power availability and plan electrical runs.
- Civil contractor: Assess pavement conditions, drainage, and foundation requirements.
- IT/networking staff: Confirm network availability and security requirements.
- Local code official (if possible): Early consultation on permit requirements and code interpretation can prevent surprises.
- Fire marshal: Verify emergency access requirements before gate placement is finalized.
Selecting a Qualified Installer
The site assessment often reveals whether a potential installer is competent. A qualified barrier gate installer will:
- Arrive with proper measuring tools, not just a phone camera
- Ask about traffic volumes and peak patterns before discussing equipment models
- Check the electrical panel and assess available capacity
- Identify drainage and environmental concerns proactively
- Reference applicable codes (UL 325, ADA, local building code) without being prompted
- Provide a written site assessment report, not just a verbal summary
The IPMI’s certified installer resources can help identify professionals with verified parking industry credentials.
Key Takeaways
- A thorough site assessment prevents the most common barrier gate installation failures: inadequate queuing, insufficient power, water damage, and code violations.
- Measure everything. Lane widths, approach distances, queue storage, power capacity, and conduit routes should all be documented with actual measurements, not estimates.
- ADA compliance is not optional. Review federal and local accessibility requirements early and design the installation around them.
- Drainage is the silent killer of barrier gate electronics. Assess water flow and plan for the worst-case storm, not average conditions.
- Document the site assessment with drawings, photos, and a written report. This documentation protects everyone involved when questions arise during installation or warranty claims.
- Run spare conduit during initial construction. The marginal cost is low, and it avoids expensive trenching when future upgrades require additional cabling.
For help selecting the right gate hardware for the site conditions you’ve documented, our complete buyer’s guide to commercial parking lot gates covers the equipment decision alongside the site requirements.